1. Go to the website and login to Admin
2. Go to WooCommerce > Settings > Payments
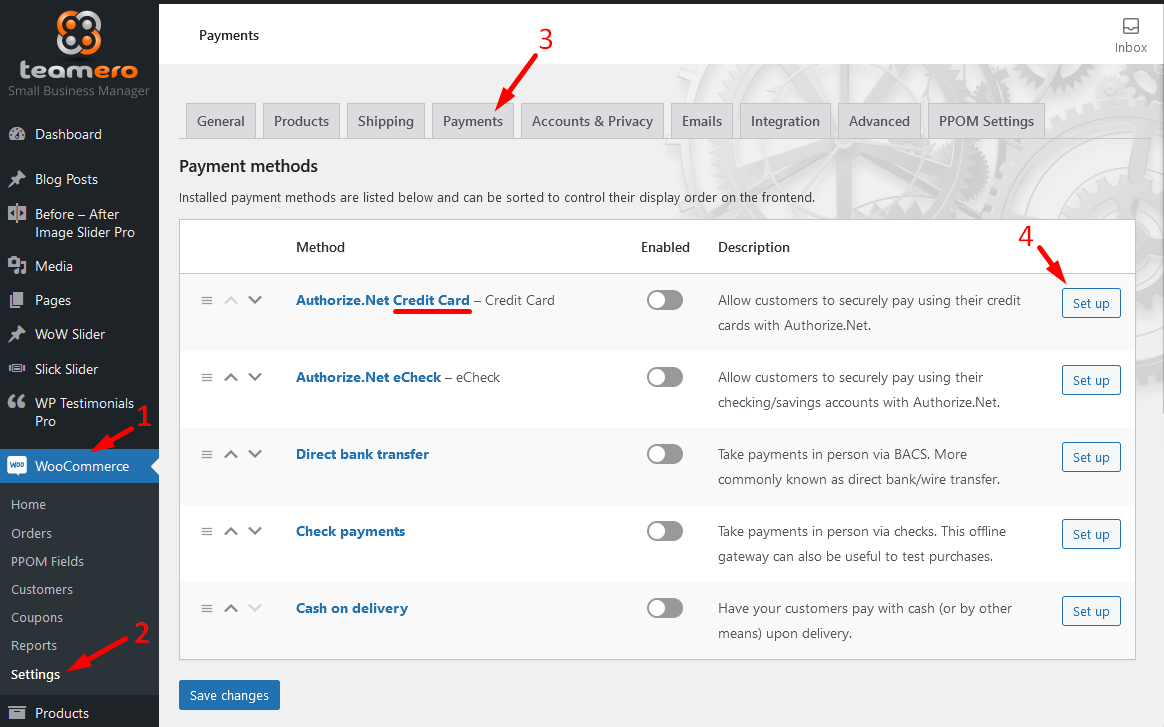
3. Check “Enable this Gateway”

4. Go into your Authorize.net account and get your API keys.
Note this is from Authorize.net’s website directly (if this doesn’t work anymore, then go to Authorize.net’s website and see if they’ve changed their steps since):
To obtain the API Login ID and Transaction Key:

1. Log into the Merchant Interface.
2. Click Account from the main toolbar.
3. Click Settings in the main left-side menu.
4. Click API Credentials & Keys.
5. Select New Transaction Key.
6. Note: When obtaining a new Transaction Key, you may choose to disable the old Transaction Key by clicking the
     box titled, Disable Old Transaction Key Immediately. You may want to do this if you suspect your previous Transaction Key is being used fraudulently.
7. Click Submit to continue.
8. Request and enter PIN for verification.
9. Your new Transaction Key is displayed.

If the Disable Old Transaction Key Immediately box is not checked, the old Transaction Key will automatically expire in 24 hours.
When the box is checked, the Transaction Key expires immediately.
5. Insert the keys here…
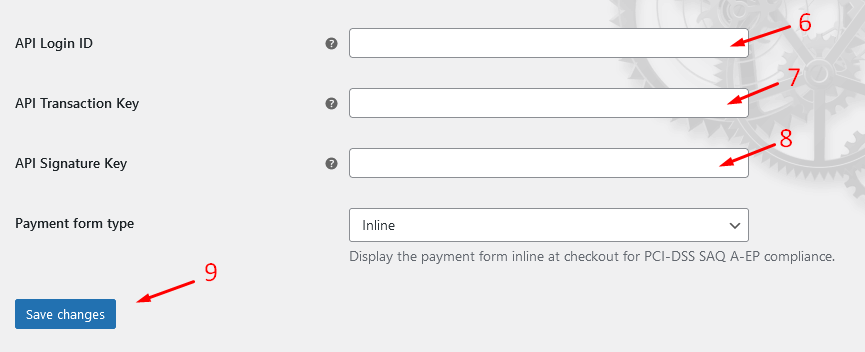
IMPORTANT: Usually those API keys are not viewable again after this has been done so you need to copy and paste them into a word doc somewhere so you can save it for future use.
