This is a tutorial we made for you to use from the experience one of our clients went through to set it up.
It’s kind of a lot of steps but it worked for them and continues to work today.
1. Create a new account at (or Sign into your existing) UPS Shipping Account https://ups.com (opens in a new tab)
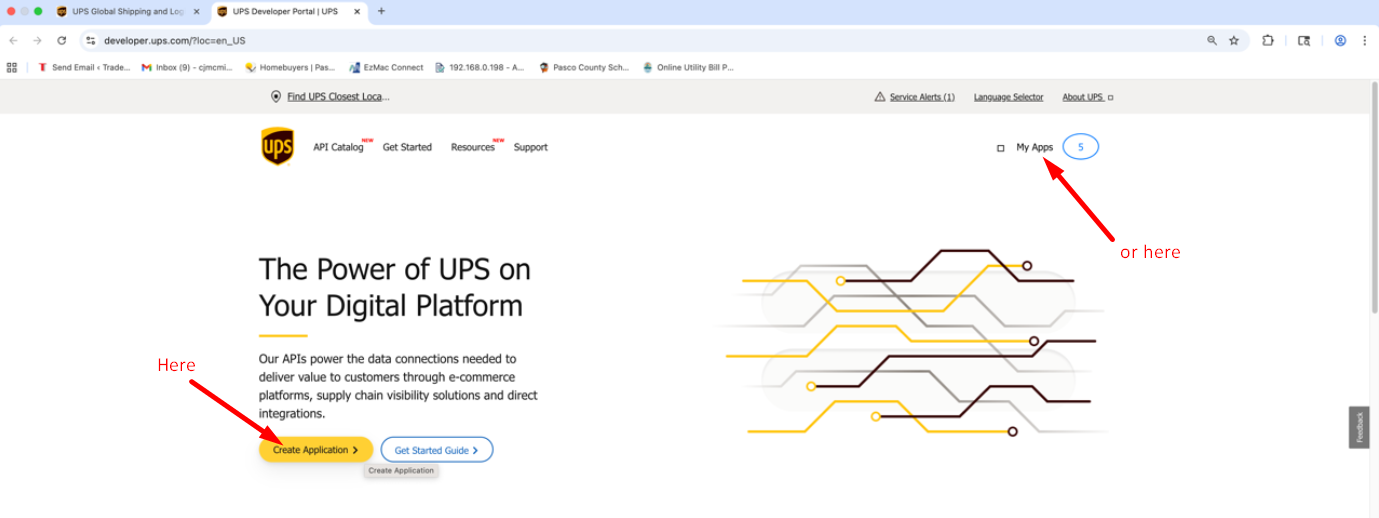
2. Click the UPS DEVELOPER PORTAL in the footer (here’s a link to the developer page… https://developer.ups.com)

3. Click “Create Application” or “My Apps”
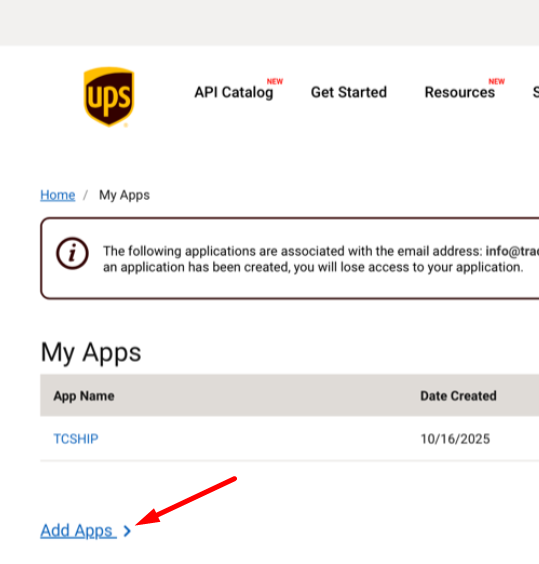
4. Click “Add Apps”
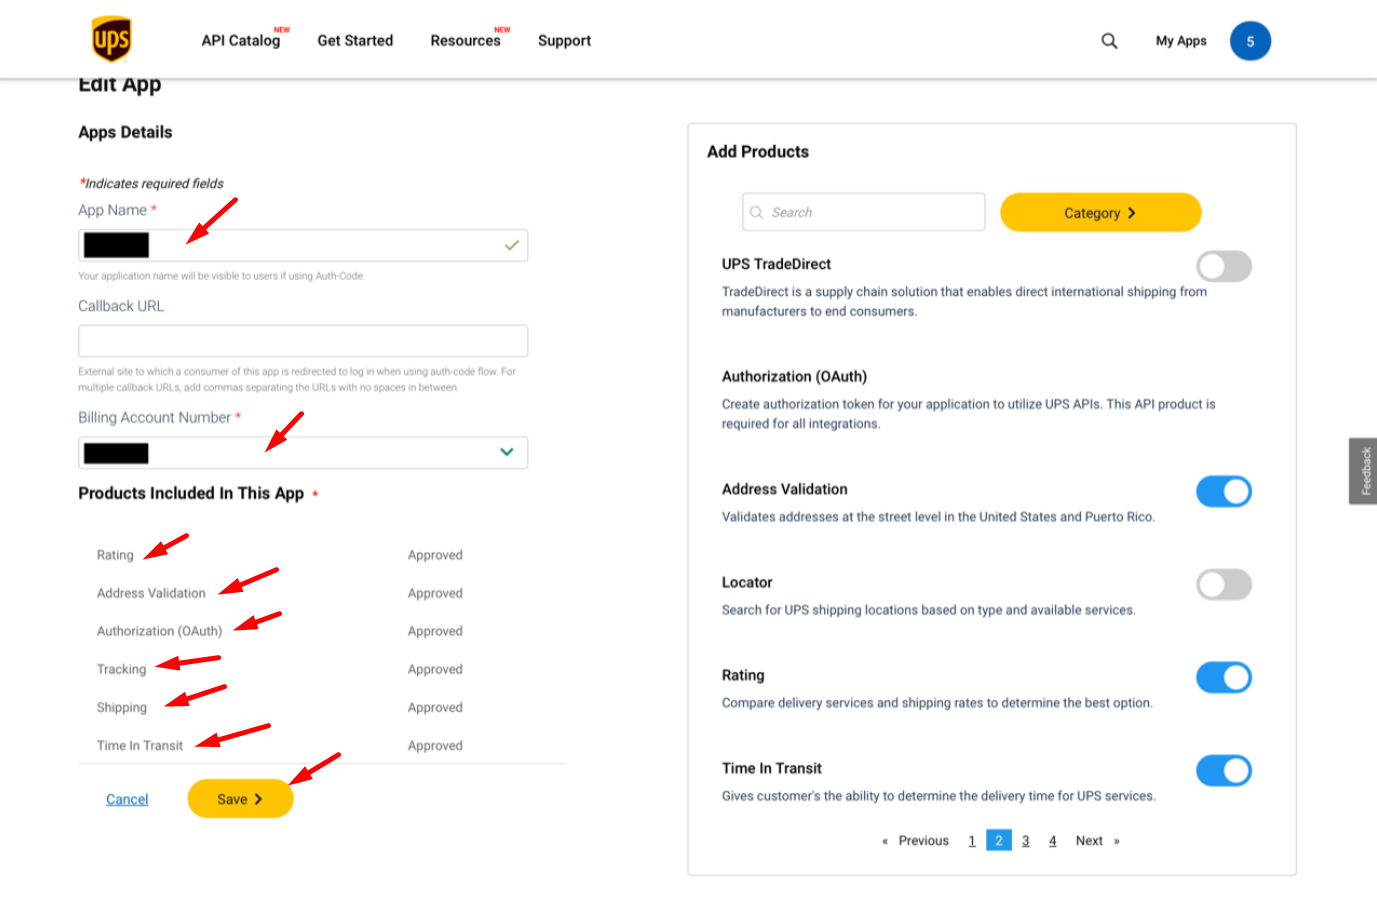
5. Enter a name for the APP, enter your UPS Billing Account Number, and choose the PRODUCTS necessary for your plugin requirements. The 6 products we chose, that worked for our client, are listed under “Products Included In This App”
6. When we first did this step, we got a “Non-Technical” error, and they had our client use a recent UPS Invoice to fill in the blanks.
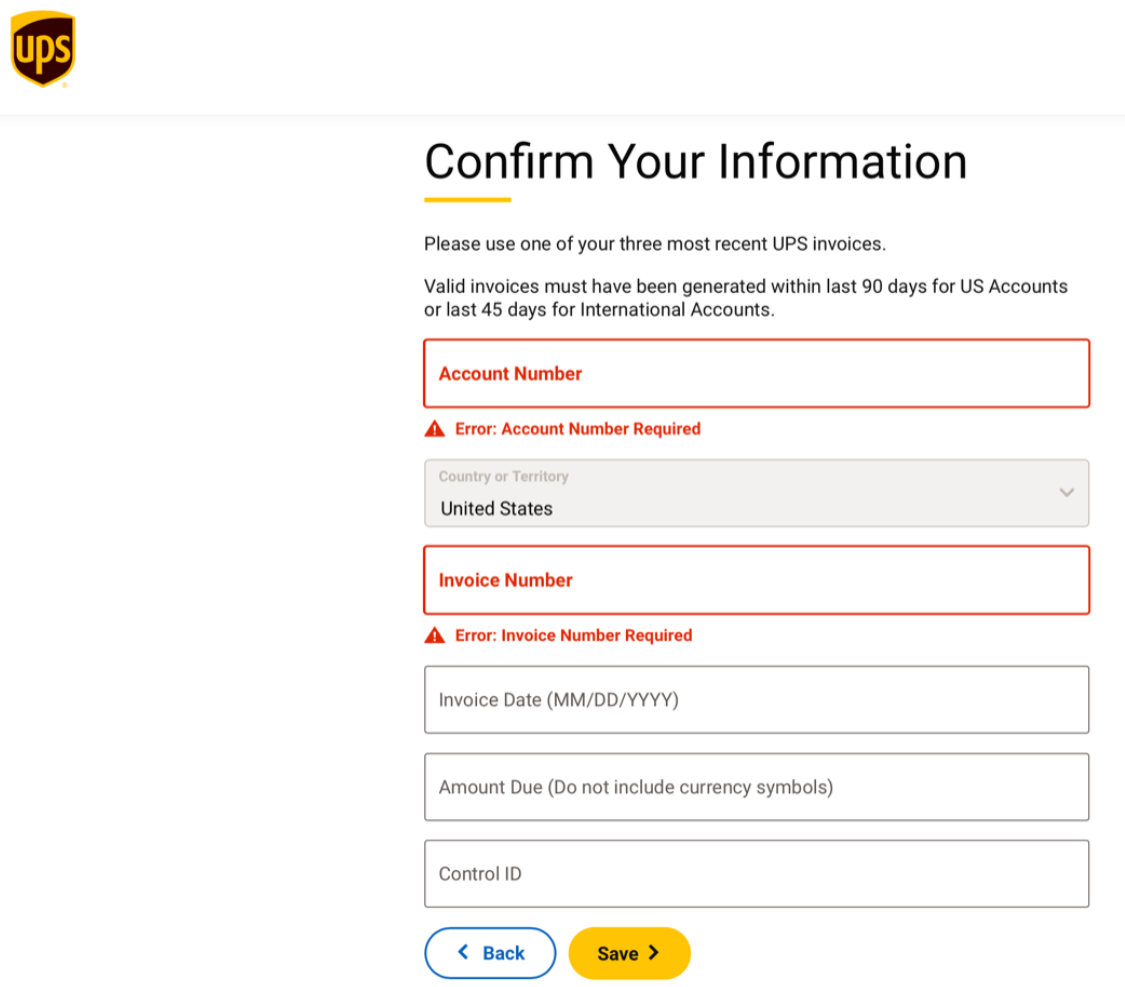
7. After we submitted the UPS Invoice information to prove the identity, we still had to contact API Technical Support for them to “lift the error message” to be able to continue with adding the application.
UPS Technical Support – API Department: 800-247-9035 (Option 3, then Option 2)
Hopefully they will help you right then and there, but for our client it took over 24hrs to get a call back from a representative just to tell our client that they “lifted the error message and you can now proceed with adding the application”
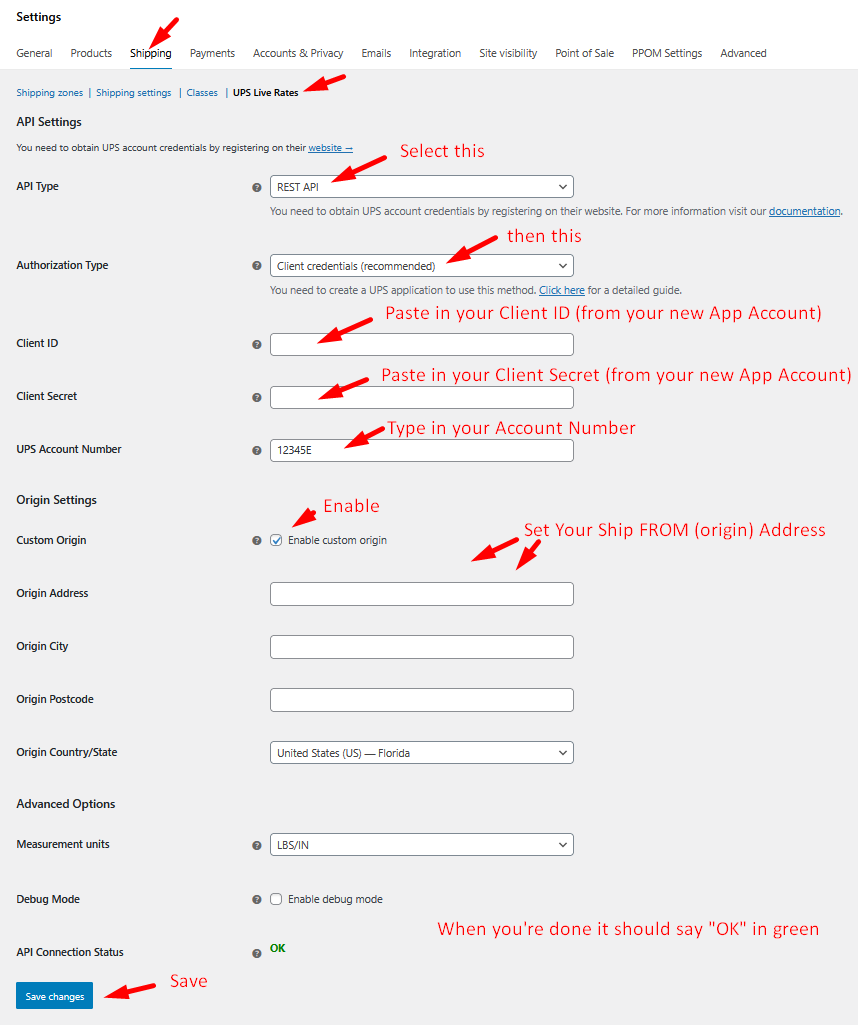
Once you’ve added the Application, you will see the credentials needed to update the UPS Live Rates plugin (client secret, etc…)
8. Then input those two items here in your website under WooCommerce > Settings > Shipping > UPS Live Rates…
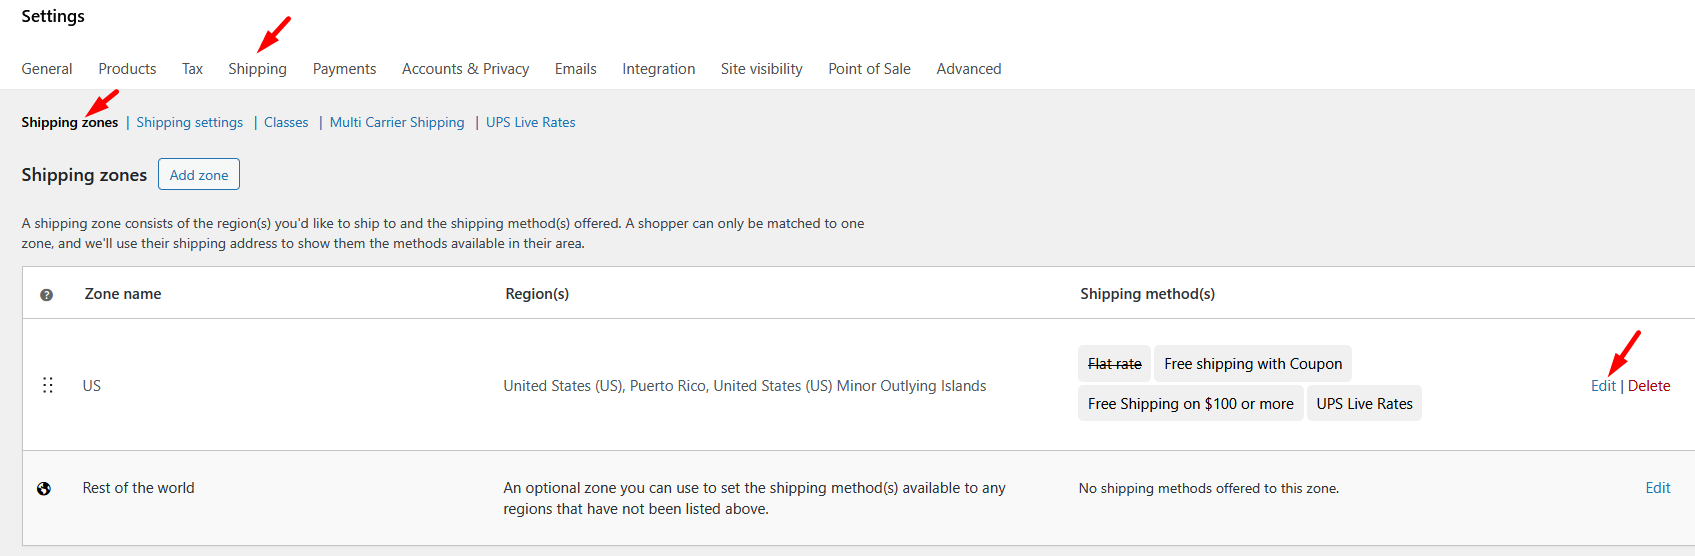
Last step is to assign a US Shipping Zone to it:
1. Go to WooCommerce > Shipping > Shipping Zones > Edit the US location
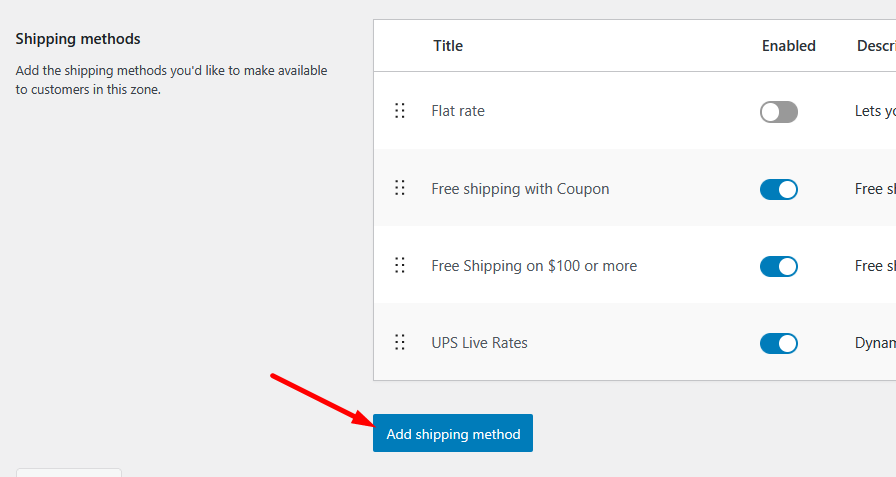
2. Click Add Shipping Method
3. Select “UPS Live Rates”
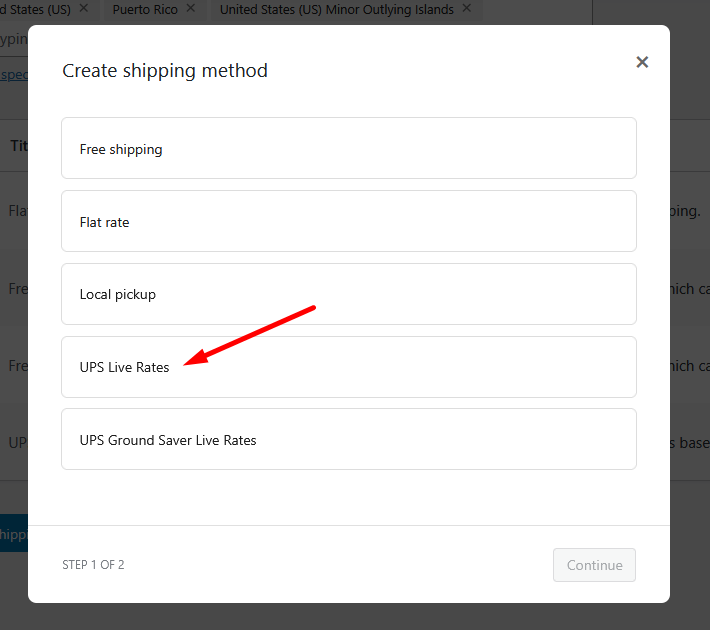
4. Then edit…
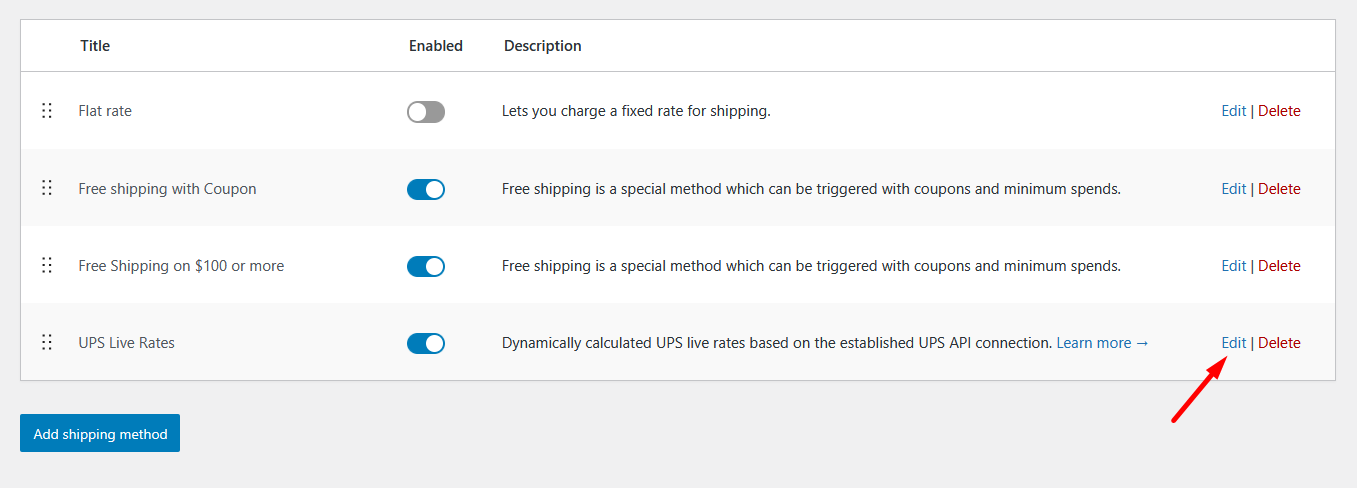
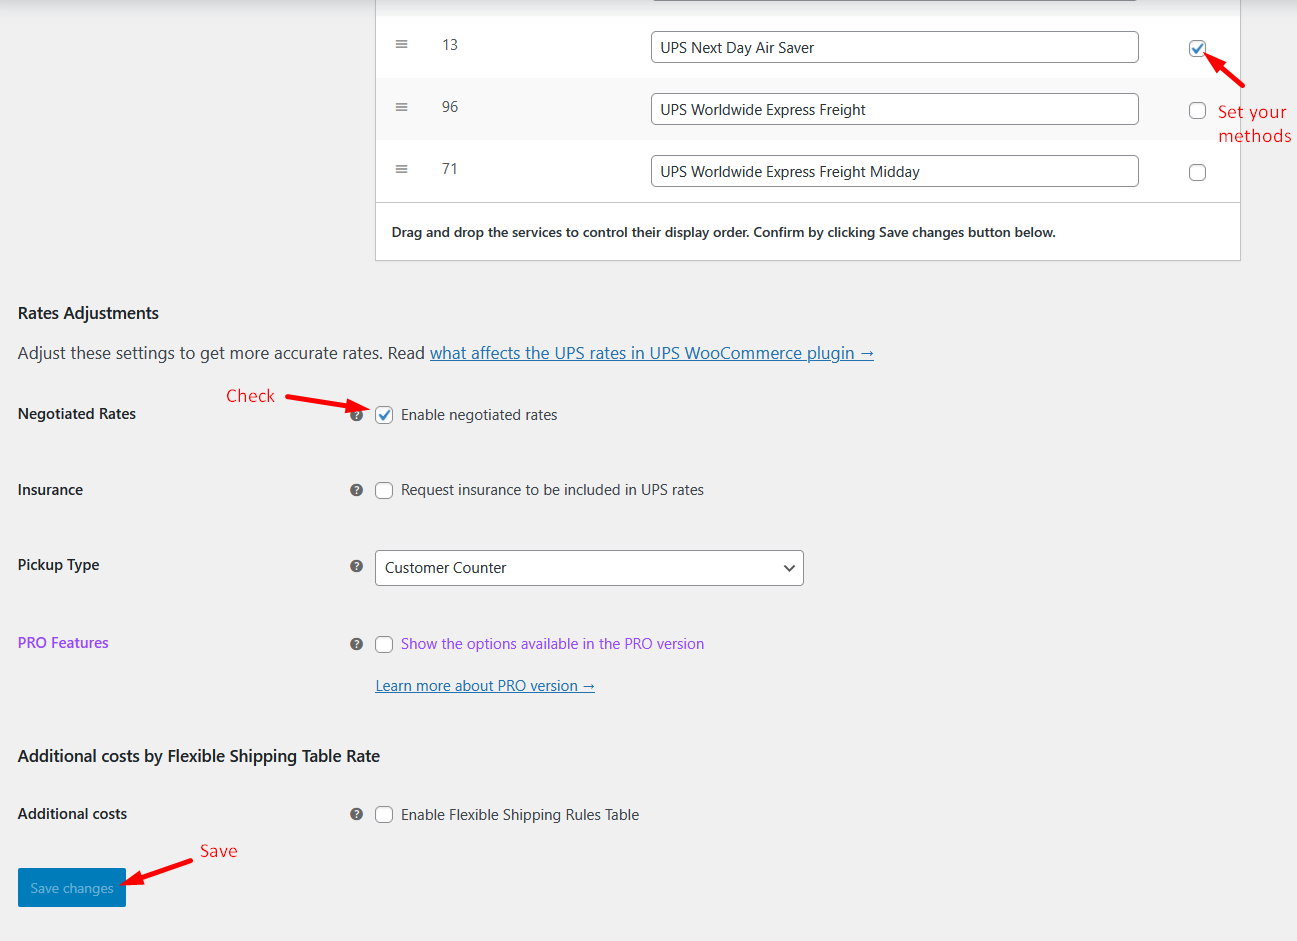
5. Set your options.
6. TEST TEST TEST!
